| |
|
|
-Seat trim restoration
|
|
|
Repair dented and damaged seat trim yourself |
||
|
Seat trim on vintage bikes from the 60's and 70's is getting harder to find. I have bought complete used seats just for the trim which was either missing or damaged on a seat I was restoring. Sometimes it just needs polishing but more often than not, it is dented, bent or scratched. You don't always have to replace it. I'll show you step by step how I have been repairing my seat trim for years. It's not as difficult as you would think. Yours truly, |
 |
|
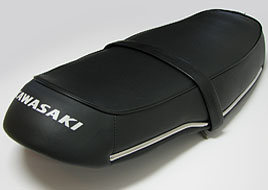
| Don't redo your seat with a new cover and reuse the old bent trim. We'll show you how to restore the original trim. | ||
 |
 |
|
|
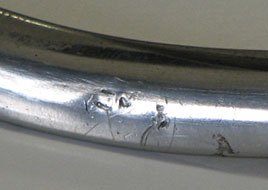
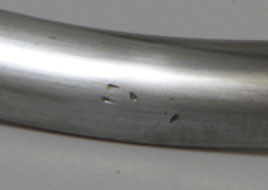
This is a close up of the damage on the 1970 Kawasaki A1 seat trim that I am fixing. These are deep gouges that I will work on but they are a little too deep for me to make completely invisible. I am not doing a show quality restoration and just want to make the trim presentable.
|
To remove dents, you must push them out from the back. It is important to look carefully to locate the highest spots. I used a small punch and a hammer to push the dents out. Go slowly and gradually remove the high spots. Be careful not to make a sharp dent. |
 |
 |
|
|
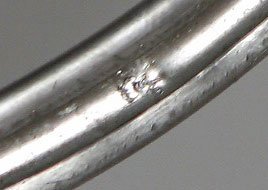
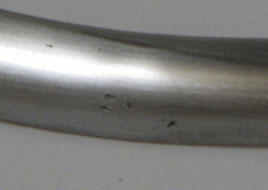
To make the surface level, I sanded the area with 220 grit sandpaper. The surface is now straight and the deep scratches are gone. As you can see the four deep gouges are still there but I didn't think I could remove them. At this point, you should remove any other scratches. |
The next step is to use 400-600 grit wet/dry sandpaper. I used it wet. You want to gradually smooth out the marks made by the 220 grit. At this stage you will start seeing results. You must do the whole area slightly beyond the damage to blend your repair. Concentrating on one small spot can also create a low spot. |
 |
 |
|
|
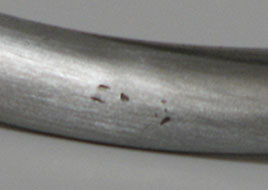
The final sanding is done with 800 grit wet/dry paper. Using sandpaper any finer than 800 grit by hand is not going to do much on stainless steel as it is very hard. Now you are ready for the buffing wheel. |
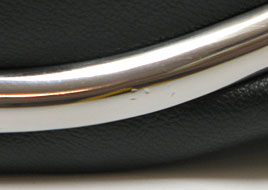
Here is the trim piece installed on the seat. It was polished on a buffing wheel using the "green" compound. The entire piece was polished and although it is not perfect, the repair is barely noticeable. |
|
 |
|
|
This is the "before" picture so that you can compare it with the refinished piece on the right. |
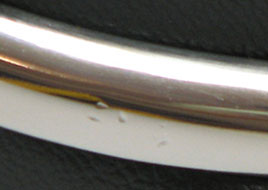
In this "after" picture you can see the deepest gouges were not completely removed. Polishing blends the repaired area makes the stainless really shine. |
 |
|
|
|
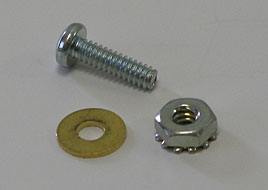
The trim mounting hardware was replaced. The originals usually break when you remove the trim. These were very inexpensive and came from the local hardware store. |
After recovering my 1970 A1 Samurai seat and installing the restored trim, it's ready for use. Best of all, I restored the seat myself and saved money in the process. |
|
Here
at Reproduction Decals we are committed to the preservation of motorcycling
history.
We don't just sell parts and graphics. We restore and ride vintage bikes. |
| Wheel Building Service | ||
| Decal Application Instructions | ||
| Applying Decals on Plastic Parts | ||
| Seat Stencil Application Instructions | ||
| What if we don't have the decals for your motorcycle? | ||
| Frequently Asked Questions and Policies | ||
| BK Custom Coatings - Our Recommended Painter | ||
| Contact Us | ||
| Customer's Comments | ||
| Customer's Bikes - See our decals in use | ||
| Restoring Seat Trim | ||
| Restoring Gauge Faces - Back Lit Meters | ||
| Restoring Gauge Faces - Side Illuminated Meters | ||
| Restoring our 1970 Kawasaki H1 - In progress | ||
| Restoring our 1968 Suzuki TC250 Scrambler | ||
| Restoring our 1970 Suzuki T125 Stinger II | ||
| NOS Honda Keys. We have thousands! | ||
| Restoring an SL70 - Randy Marble shows us how | ||