| |
|
|
-How to restore gauge faces - Non Illuminated
|
|
|
Treat your old gauges to a facelift - Metal faces with side illumination |
||
|
Replacing old instruments with new (NOS) gauges is becoming almost impossible or very expensive. Restorers can now restore their original gauges with excellent results. Disassembly and reassembly of our 1970 H1 gauges was done by the experts at Z-Resto. We did the faces so that we could photograph the process and sent them back to Bob to do the rest. Early H1 gauges like these require skill and special tools to remove the trim ring that retains the glass. Special thanks to Bob Harrington at Z-Resto who made our gauges look new again. Yours truly, |
 |
|
| What a difference replacing the faces can make. The 1970 H1 gauges avove and the 1974 H2B gauges below were both restored with our face decals. | ||
 |
||
 |
 |
|
|
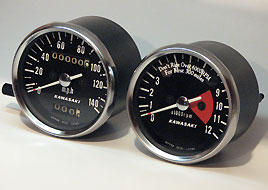
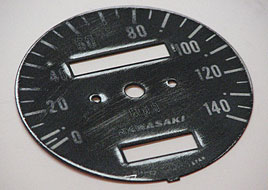
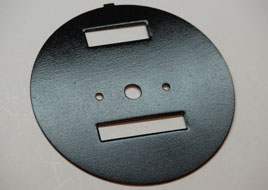
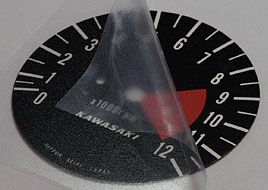
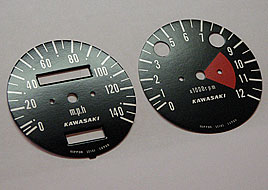
These original gauge faces were in reasonably good condition until you looked closely. The typical problems are a faded redline, white areas turning yellowish and cracked black paint on the entire faces.
|
Lenses for the warning lights must be removed before you start. mark the back or take pictures so that you replace them in the correct locations. |
 |
 |
|
|
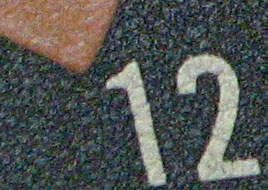
This close up picture illustrates how badly cracked the finish on our tachometer was. Both faces must be prepared for the decals. Any imperfections or roughness on the face will show once the thin decal has been applied. |
220 grit sandpaper was used to sand the information off the face. The white lettering was screen printed over the black and must be sanded down to make the face flat. |
 |
 |
|
|
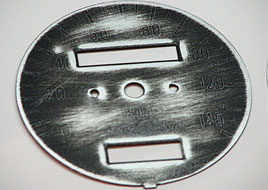
The final sanding on the speedometer was done with 400 grit sandpaper for a smooth finish. As you can see, there are still traces of the old information but the face is now smooth enough for painting. |
The tachometer took less effort to sand smooth. Keep in mind that the important thing is to create a smooth finish to paint over. |
 |
 |
|
|
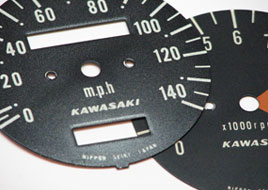
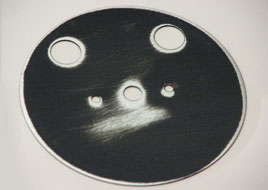
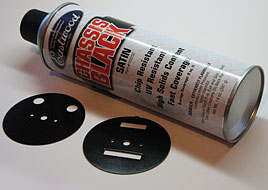
The faces are both painted in satin black. I used Eastwood Co. chassis black that has great coverage. It dries fast and does not require priming. Similar paint should be readily available from most automotive parts suppliers.
|
We do this so that all edges are black because the openings on the speedometer are curved inward and it will ensure that there is no silver showing once the decal is applied. |
 |
 |
|
|
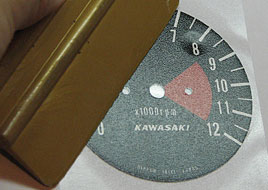
When the paint is completely dry, check for dust, runs or uneven spots on the faces. To make the surface as smooth as possible, I used 600 grit wet/dry sandpaper which worked well. It was used with water.
|
Find a white surface and tape the back of the gauge face down to prevent it from moving. Carefully remove the decal from the backing by pulling a corner of the transparent covering. |
 |
 |
|
|
Take your time to carefully align the decal over the gauge face. The 3 holes are the best way to ensure correct positioning. Do not allow the decal to touch the surface until you have perfect alignment. Use a hard flat object to press down the decal by pushing outward from the center to the right and to the left. |
When it is firmly in place, roll back the clear covering. Do not lift. Pull it back or the decal may lift if you have not pressed it down everywhere. Take your time. |
 |
 |
|
|
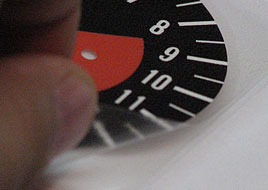
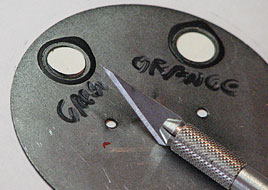
The holes for the lenses are covered and must be cut out and areas of the decal that extend beyond the edge of the gauge face must be trimmed with a small knife. Trimming the hole afterward ensures perfection if your alignment is off slightly.
|
A knife similar to the one shown is ideal for this job. It has a small and very sharp point. When trimming, allow the blade to follow the metal edge of the face and your cutting will be perfect. |
 |
 |
|
|
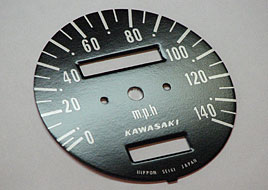
The speedometer required no trimming of the meter openings. Be sure to check and press all edges down. The decals fit perfectly and none of the painted surface shows but it provides a good surface for the decals to adhere. |
All done! The gauges are ready to be reassembled once the housings are repainted and the trim ring is polished. Almost as good as new and at a fraction of the cost of NOS gauges. Best of all, you can do it yourself. |
 |
 |
|
|
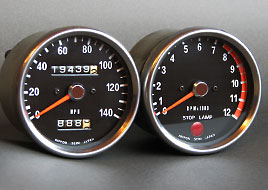
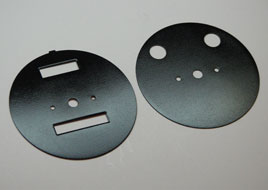
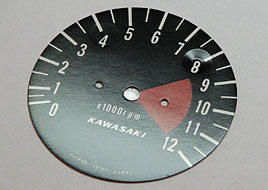
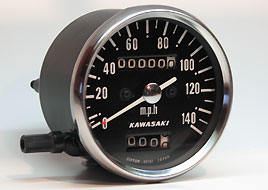
The speedometer reassembled with our faces. The housing was repainted, trim ring polished and mileage reset to zero. |
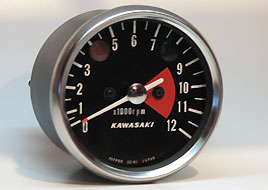
The restored tachometer looks great. Just like new and best of all, no more faded redline. |
|
|
|
|
Just like new. Our 1970 H1 gauges are restored and look like new. Thanks to Bob Harrington at Z-Resto who did a great job. |
These H2B gauges were restored by us. New faces applied, needles repainted and looking like new again. |
|
Here
at Reproduction Decals we are committed to the preservation of motorcycling
history.
We don't just sell parts and graphics. We restore and ride vintage bikes. |
|
PARTS
SOURCES
|
|
Reproduction
Decals
London, Ontario Canada Reproduction Decals & NOS and reproduction parts e-mail: stickers@reproductiondecals.com telephone: 519 668-7152 |
| Wheel Building Service | ||
| Decal Application Instructions | ||
| Applying Decals on Plastic Parts | ||
| Seat Stencil Application Instructions | ||
| What if we don't have the decals for your motorcycle? | ||
| Frequently Asked Questions and Policies | ||
| BK Custom Coatings - Our Recommended Painter | ||
| Contact Us | ||
| Customer's Comments | ||
| Customer's Bikes - See our decals in use | ||
| Restoring Seat Trim | ||
| Restoring Gauge Faces - Back Lit Meters | ||
| Restoring Gauge Faces - Side Illuminated Meters | ||
| Restoring our 1970 Kawasaki H1 - In progress | ||
| Restoring our 1968 Suzuki TC250 Scrambler | ||
| Restoring our 1970 Suzuki T125 Stinger II | ||
| NOS Honda Keys. We have thousands! | ||
| Restoring an SL70 - Randy Marble shows us how | ||