| |
|
|
-Project
T125 Stinger
|
|
|
Reproduction Decals transforms this 1970 Suzuki T125 from junk to a gem |
|
|
This page is to document the restoration of our Stinger II. These are becoming increasingly difficult to find and almost as hard to find parts for. We'll take you through the restoration with pictures, comments and information. Hopefully this will show you that it is not as hard as you may think to restore a vintage Japanese motorcycle. As you will see, parts for these machines are out there if you know where to look. Yours truly, |
 |
 |
 |
|
|
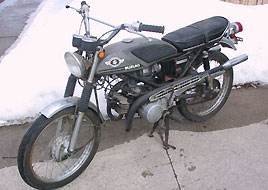
Here's
where it all began.
After a searching for some time, we found a rough but restorable Stinger. Locating one here in Canada proved to be more challenging than we expected. This example was found close to home by my friend Bill Coulson, a fellow Suzuki enthusiast. |
 |
Although it wasn't much to look at, a couple of hours spent cleaning the carbs, checking the points and replacing the spark plugs had it running beautifully. One kick and it would start every time and idle smoothly. See the green paint
showing through the gray? |
 |
 |
|
|
I
like to determine the mechanical condition of a project before tear
down if possible. This avoids a lot of work and potential damage to
freshly painted or polished parts after the bike has been reassembled.
|
|
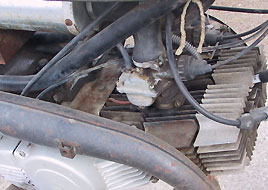
In
spite of being a good runner, this motor needs some TLC. Over thirty years
of rust, corrosion and grime must be removed. I had to disassemble most
of the motor to do so. Because it runs so well and there is no indication
of problems the cases were not split. |
 |
 |
|
|
Another
picture to illustrate exactly what we were up against. Lots of grime
with cables and wires that seem to be routed incorrectly. I take lots
of pictures to help route them correctly when the bike goes back together,
but these were not of much use.
|
|
The
front forks were okay once they were cleaned up and new seals installed.
The rear shocks were not. These had to be replaced. |
 |
 |
|
|
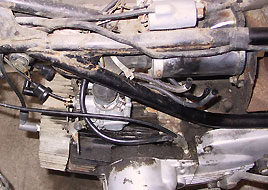
Here
is the right side engine cover. The pictures don't show how badly gouged
they were from a previous mishap. The oil lines were so brittle from
age, two of them broke while trying to remove them.
|
|
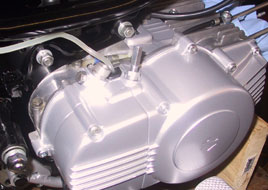
As
you can see, the crank cases are now clean and the covers look like new.
All road rash has been repaired and repainted. The oil lines replaced
with new ones, thanks to my good friend Paul Miller of Paul Miller Motorcycle
in Connecticut, USA |
 |
 |
|
|
I
have skipped over the installation of the motor. It is now back in the
freshly painted frame and the wiring is well underway. This is also
a good time to run cables and oil pump lines. I couldn't resist putting
on the tank and seat to see how it looks. It also gives the illusion
of being further along than I really was.
|
|
After
hours of cleaning the crank case it looks like new. I used solvents and
a parts washing brush. Some tight places required a toothbrush. The T125
cases have fins which make this job a little more work but it was worth
the effort. |
 |
 |
|
|
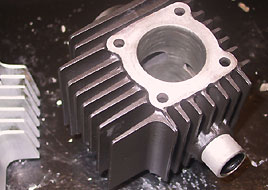
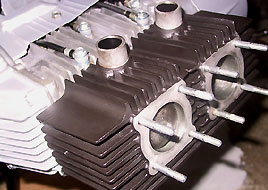
While
the cylinders were off, I honed the bores and replaced the rings. New
head and base gaskets were used. The old rings were still well within
acceptable tolerances, but piston rings are not expensive.
|
|
With
the cylinders in place, the next step is to put the cylinder heads back
in place. Before installing them, I checked for cracks and lightly resurfaced
them to ensure they were not warped. |
 |
 |
|
|
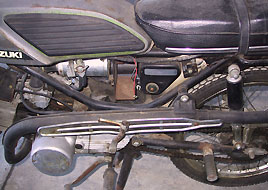
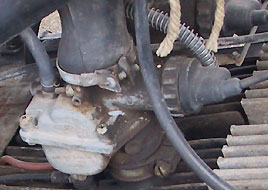
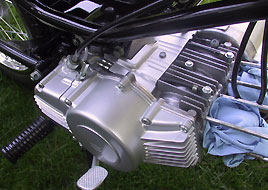
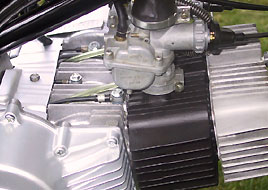
With
the cylinders and heads on, I was able to put on the carburetors and
route all of the cables. It is a good time to set up the carbs while
the area is less cluttered with hoses and the exhaust pipes. Don't leave
this job until the end.
|
|
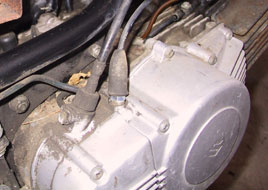
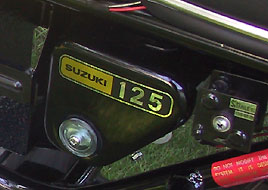
Most
of the wiring is now complete and some of the small details such as decals
can be added. If you are doing a full restoration, you will want to replace
the oil level inspection lens. They often discolor and even crack over
time. |
 |
 |
|
|
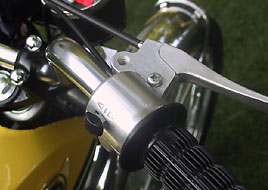
All cables were replaced as well as the right and left switch assemblies.
The hand grips were also replaced. Running the switch wires through
the handlebars required some patience.
|
|
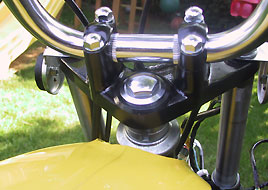
New handlebars and
bolts were used on the front end. The clamps and upper steering stem
head were glass beaded and painted black. The handlebars are the optional
"western" handlebar that has no cross brace. |
 |
||
|
The
tank was repainted by Paul Miller in yellow. This was an optional color
seldom seen on this model. It was offered in "pop green" &
"candy yellow" in 1970 as well. We also have a freshly painted
green tank but I prefer the yellow. The badges are items that we stock.
|
|
Another
gem from Paul Miller. This seat cover is an "exact" reproduction
of the original, right down to the heat pressed seams. This one item can
make or break your Stinger restoration. The rear shocks are B100P which will be replaced when the NOS T125 shocks arrive. |
 |
 |
|
|
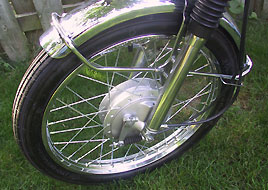
The
front fender is NOS as are the complete front and and back wheels. No
need to mention where these came from right? The original fork boots
were in perfect condition and reused. Not many parts from the original
bike were.
|
|
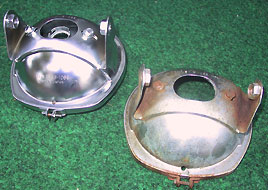
The
original headlight assembly was bent and badly rusted. It was replaced
with NOS pieces. Repairing and rechroming them was not worth it. |
 |
 |
|
|
The
the exhaust heat shields are a mix of NOS and original. The original
one has since been straightened and cleaned up so well that you would
have to look very close to know which it is.
|
|
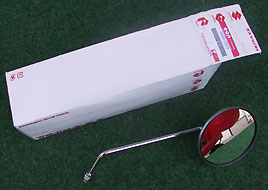
When it's all done,
there are a set of NOS mirrors waiting to be installed. |
 |
 |
|
|
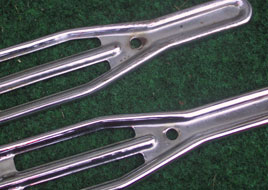
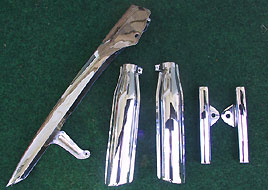
The parts are
back from being rechromed and look great! Better than new but reputable
chrome shops will not duplicate the poor quality plating that was
originally on these parts. |
|
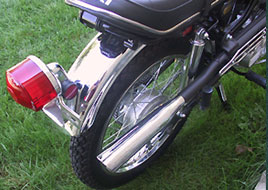
A picture of the
back of the bike. The rear fender was rechromed as well and the tail
light assembly is mounted.
|
 |
|
|
|
New
gearbox oil and some gas and our T125 fired up and ran but not well.
I discovered by connecting a battery that I had around the shop that
the left cylinder gets a really weak spark without a battery connected.
Once a battery was connected, both cylinders fired right up and our
bike runs great.
|
|
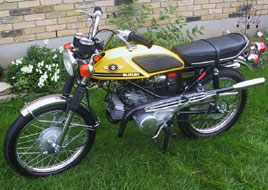
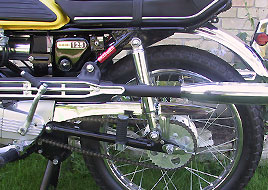
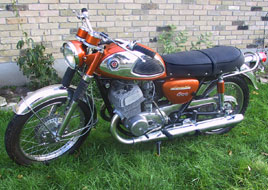
Finished at last!
Our Stinger looks as good as the day it rolled off the assembly line.
It runs as good as it looks and riding it is loads of fun. Another big
thanks goes to my good friend Paul Miller. He supplied most of the the
parts and his knowledge of all things Suzuki was invaluable throughout
the restoration. This bike is now a permanent part of our collection. |
 |
 |
|
|
This
1969 AS50 Colt was completed early in 2005. It was in rough condition
but relatively complete. A good friend Gerald, known to some as "Suzuki
Canada" knew I wanted it. A deal was eventually struck and I got
a project bike and he now has carbon fiber exhaust for his Katana. Little
did I know how tough it is to find certain parts for this model. It
was well worth the effort.
|
|
Our 1968 T500 Cobra
also came to us as a complete bike. This one ran but the motor was completely
rebuilt. It was disassembled to restore and spent about 5 years in boxes.
When all of the parts to complete it were collected, it didn't take
long to assemble this very nice early T500. Restoration was completed
in 2004. |
|
Here
at Reproduction Decals we are committed to the preservation of motorcycling
history.
We don't just sell parts and graphics. We restore and ride vintage bikes. |
|
PARTS
SOURCES
|
|
Paul Miller Motorcycle |
Reproduction Decals |
| Wheel Building Service | ||
| Decal Application Instructions | ||
| Applying Decals on Plastic Parts | ||
| Seat Stencil Application Instructions | ||
| What if we don't have the decals for your motorcycle? | ||
| Frequently Asked Questions and Policies | ||
| BK Custom Coatings - Our Recommended Painter | ||
| Contact Us | ||
| Customer's Comments | ||
| Customer's Bikes - See our decals in use | ||
| Restoring Seat Trim | ||
| Restoring Gauge Faces - Back Lit Meters | ||
| Restoring Gauge Faces - Side Illuminated Meters | ||
| Restoring our 1970 Kawasaki H1 - In progress | ||
| Restoring our 1968 Suzuki TC250 Scrambler | ||
| Restoring our 1970 Suzuki T125 Stinger II | ||
| NOS Honda Keys. We have thousands! | ||
| Restoring an SL70 - Randy Marble shows us how | ||