Reproduction Decals Home
-Application Instructions for Seat Stencils
 
Applying your seat stencil in 12 easy steps
Click here view our selection of SEAT STENCILS

Step 1

Here's what you need to get started:
- vinyl color spray
- rubbing alcohol
- one of our stencils
- your seat

Step 2

Carefully clean the area where you are applying the stencil to your seat. It is important to ensure a clean surface for the vinyl color to properly adhere.

Step 3

Hopefully you asked your upholsterer to save the section of the seat with the name on it. A picture and measurements will also work.

Step 4

This picture shows the stencil applied to the back of the seat. Be sure it is positioned correctly before firmly pressing it on.

Step 5

To be sure everything is protected from overspray, we wrap the seat in a garbage bag. You must tape the bag carefully around the stencil.

Step 6

Follow the manufacturer's instructions and spray the area. Applying in several light coats is very important.

Step 7

Once you are satisfied that you have smooth, even coverage, allow a few minutes for the vinyl color to dry before removing the masking material.

Step 8

Now that all of the masking is removed, use your fingertip on the stencil to be sure color is dry to touch. If so, you can start removing the stencil.

Step 9

Slowly and carefully peel back the stencil.

Step 10

Carefully, with the tip of a knife lift the remaining pieces of the stencil.

Step 11

Step 10 and 11 require care and patience. Did we say be careful with the knife?

Step 12

You're finished! Now it looks like you were lucky enough to find an NOS seat for your vintage bike.


Tips to help you apply your graphics

  1. The stencil will stick firmly and cannot be repositioned when it contacts the vinyl material used on most seats so care must be taken.

  2. Removal of the seat is recommend.

  3. Clean the surface that the stencil will be applied to. The surface must be free of cleaners, solutions or solvents. Unless all traces of silicone based cleaners and protectants are removed, the stencil and eventually the color will not adhere.

  4. The stencil is between a backing paper & a transparent application tape. Peel off the backing paper making sure the whole graphic sticks to the application tape.

  5. Apply the graphic to the surface. Press firmly starting from the center out to edges using your fingers. Use a credit card or similar item to ensure good adhesion.

  6. Peel back the application tape carefully, should the graphic start to lift push it back down then continue peeling back the tape. Check all edges to be sure that stencil is properly applied.

  7. Mask off all exposed areas that you do not wish to paint and wipe any dirt or dust from area to be sprayed.

  8. Most automotive suppliers carry vinyl color (paint) in aerosol cans. Follow the manufacturer's instructions and apply the color to your seat.

  9. Once dry, carefully remove the mask. Peel from the outside edges to avoid damaging painted surface.

Click here view our selection of SEAT STENCILS

 
Wheel Building Service  
Decal Application Instructions
Applying Decals on Plastic Parts
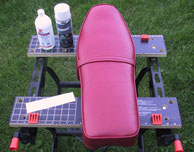
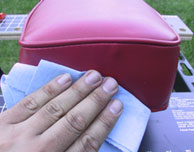
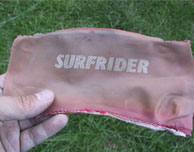
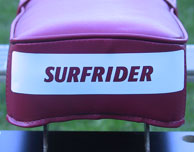
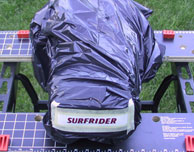
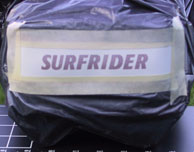
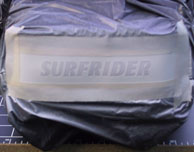
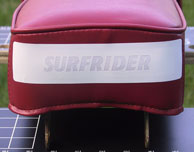
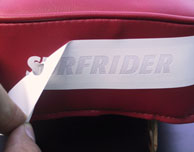
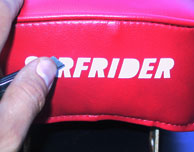
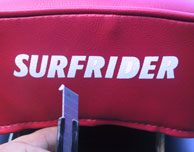
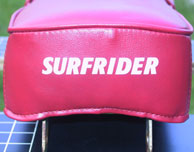
Seat Stencil Application Instructions
What if we don't have the decals for your motorcycle?
Frequently Asked Questions and Policies
BK Custom Coatings BK Custom Coatings - Our Recommended Painter
BK Custom Coatings Contact Us
Customer's Comments
Customer's Bikes - See our decals in use
Restoring Seat Trim Restoring Seat Trim
Gauge Restoration Restoring Gauge Faces - Back Lit Meters
Gauge Restoration Restoring Gauge Faces - Side Illuminated Meters
Restoring our 1970 Kawasaki H1 - In progress
Restoring our 1968 Suzuki TC250 Scrambler
Restoring our 1970 Suzuki T125 Stinger II
NOS Honda Keys. We have thousands!
Restoring an SL70 - Randy Marble shows us how