| |
|
|
-How to restore gauge faces - Illuminated
|
|
|
Treat your old gauges to a facelift - Back lit plastic faces |
||
|
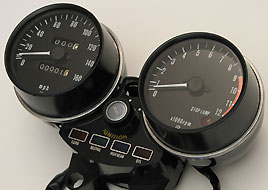
Replacing old instruments with new (NOS) gauges is becoming almost impossible or very expensive. Restorers can now restore their original gauges with excellent results. Disassembly and reassembly of our 1974 Z1A gauges is something that can be done with a little skill and some patience. This type of gauge can be restored from start to finish by you because the ring that holds the upper ring and glass in place is not visible from behind once assembled. Although they worked fine, our Z1 gauges needed a complete restoration. We show you step by step how we did it. Yours truly, |
 |
|
| These gauges are restored with a set of our face decals. The mounting bracket, wiring, ignition switch, light cover and lower gauge covers are all items from our stock. | ||
 |
||
 |
 |
|
|
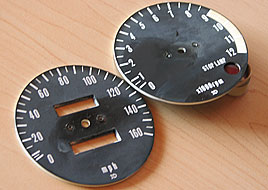
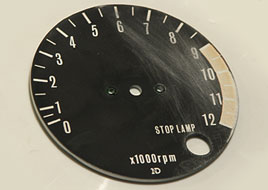
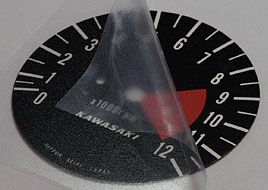
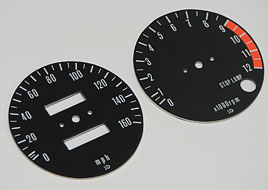
These original gauge faces were in reasonably good condition and not warped or cracked. The typical problems are a dull black paint and faded redline. Examine closely for cracks or warping from years of UV exposure.
|
Lenses for the warning lights must be removed before you start. It is best to take pictures so that you replace them in the correct locations. |
 |
 |
|
|
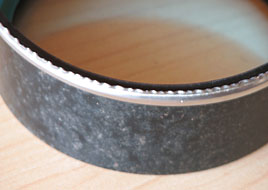
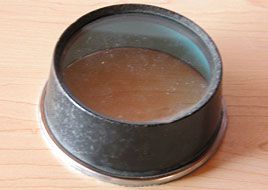
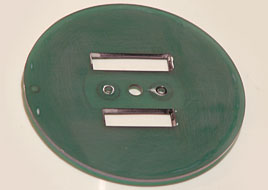
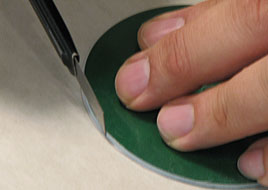
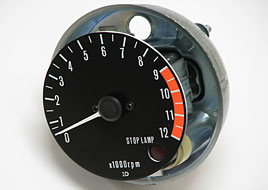
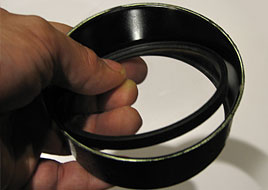
This close up picture illustrates shows the trim ring that was carefully opened to allow the housing and clear plastic cover to be separated from the meter itself. |
We use a small flat screwdriver and gently pry a little at a time. This takes time because you must pry every few millimeters going around and around until the ring has opened up enough to allow the upper and lower sections to come apart. |
 |
 |
|
|
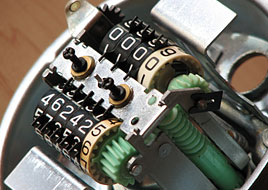
When you have the gauges apart, the needle must be removed. It is a "press fit" and simply pulls off the tiny shaft. If yours is not coming off by hand, you can gently pry but be careful not to bend it's shaft or crack the plastic face. I found that prying from opposite sides worked well. |
Now that the needle has been removed, the 2 screws that hold the face in place must be removed. Be sure to use a phillips screwdriver of the correct size so you don't damage the screw heads. These screws must be reused and damage will be noticeable. |
 |
 |
|
|
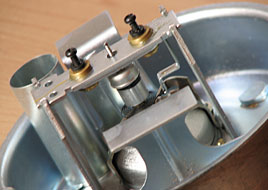
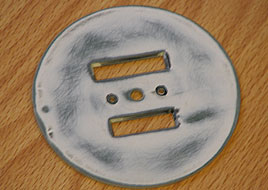
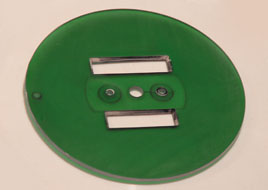
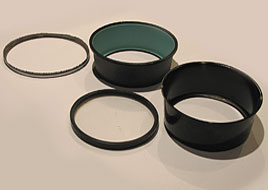
This is the upper section of the gauge that holds the clear plastic face. This will have to be disassembled to repaint and the lens will be polished with a scratch remover designed for plastic. |
220 grit sandpaper was used to sand the information off the face. A sanding block will keep the sand paper flat and prevent warping the face. Under the black area is a white base that must also be removed. |
 |
 |
|
|
The entire face had white screen printed directly onto the front. The black was overprinted and must be sanded down to make the face flat. Under the white is clear plastic. |
All of the printed information has been removed with 220 grit sand paper. At this stage you can still see the sanding marks. The back doesn't need to be sanded at all. |
 |
 |
|
|
The face is getting smoother and more transparent with 400 grit sandpaper with removes some of the marks from the 220. |
The plastic is no longer hazy after using 800 grit wet/dry sand paper with water. |
 |
 |
|
|
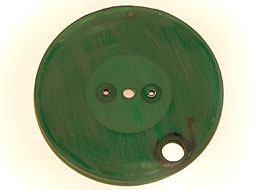
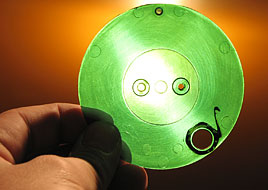
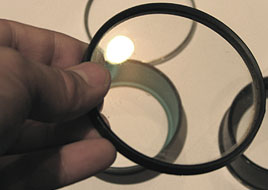
This shows the blank face with light behind it. Once the new decals are applied, the white numbers will illuminate. We use a material designed for back lit applications.
|
Carefully remove the decal from the backing by pulling a corner of the transparent covering. H1 gauge face shown |
 |
 |
|
|
Take your time to carefully align the decal over the gauge face. The 3 holes are the best way to ensure correct positioning. Do not allow the decal to touch the surface until you have perfect alignment. Use a hard flat object to press down the decal by pushing outward from the center to the right and to the left. H1 gauge face shown |
When it is firmly in place, roll back the clear covering. Do not lift. Pull it back or the decal may lift if you have not pressed it down everywhere. Take your time. If there are very small bubbles trapped underneath, they will often disappear within 24 hours. H1 gauge face shown |
 |
 |
|
|
The decal will extend approximately 1 millimeter past the edge of the face. This can be trimmed off as shown or rolled over the edge and pressed down. This extra material is there to ensure full coverage even if your alignment is off a little.
|
The hole for the lens is covered by the decal and must be cut out. We have found through experience that many people have had trouble aligning the face with pin point accuracy and trimming the hole afterward ensures perfection if your alignment is off slightly. |
 |
 |
|
|
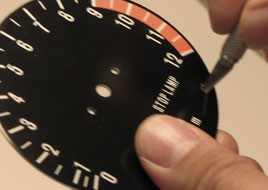
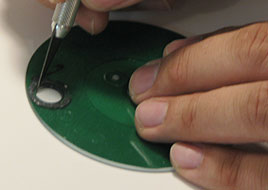
A knife similar to the one shown is ideal for this job. It has a small and very sharp point. When trimming, allow the blade to follow the edge of the hole in the face and your cutting will be perfect. This image shows the hole being cut from the front. |
You can also cut the hole from the back. Cutting from the front or back seems to work equally well. It comes down to personal preference. If you cut from the back, be sure the surface is clean. Any dirt or debris can scratch the decal. |
 |
 |
|
|
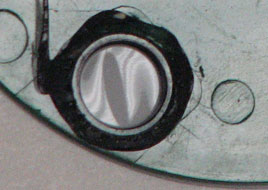
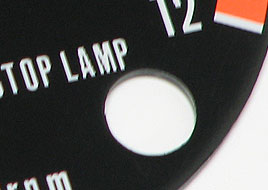
Here's the hole for the stop lamp on the tachometer. It took about 2 minutes and it is perfect. It would be nearly impossible to apply the decal this accurately no matter how steady your hand is. |
The tachometer is finished. Now the red "stop lamp" lens can be glued back in place. I used Permatex "black silicone" adhesive/sealant. It looks exactly like what was originally used. A similar product will should be just as good. |
 |
 |
|
|
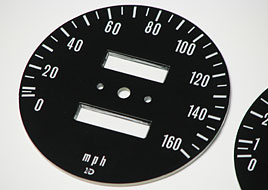
The speedometer required no trimming of the meter openings. Be sure to check and press all edges down. The original faces had black paint on the inside edge of the rectangular meter openings. We will use a small brush and paint this by hand. |
We are close to reassembly time. The upper covers and lenses will be restored. Components such as the bracket, lower covers, warning lamp cover, hardware and ignition switch will ne replaced with new parts that we stock. More pictures and info will be added as we finish the restoration. |
 |
 |
|
|
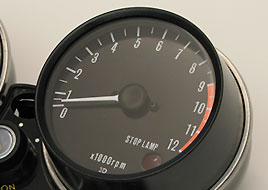
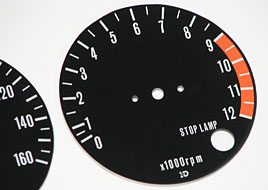
The tachometer face is now in place. When tightening the 2 small screws, take care not to over tighten. Press the needle onto the shaft in the correct location. |
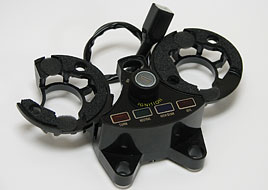
The mounting bracket, warning lamp console and ignition switch are new replica parts that we stock. A much better option than using the originals. |
 |
 |
|
|
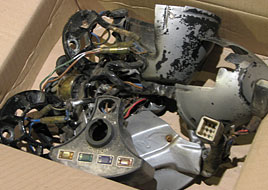
Many of the original parts were not repairable. Most parts are faded, damaged and covered in silver paint that was brushed on the entire assembly. Restoring them is not worth the time and effort when new replacements are available. |
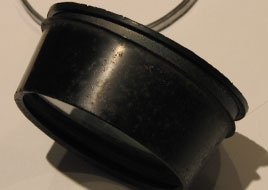
The upper housing must be reused and must be disassembled to repaint it. There is a blue inner sleeve that is held in place by a rubber seal that is fitted around the edge. |
 |
 |
|
|
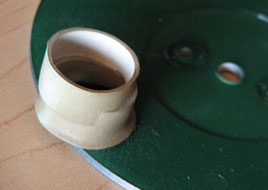
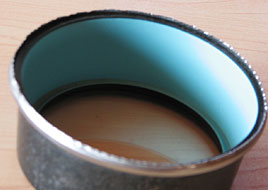
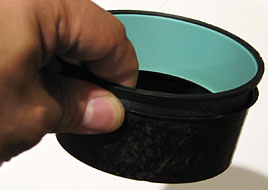
Gently pry between the rubber seal and the metal housing to remove the inner sleeve. This image shows it part way out so that you can see that the seal and sleeve come out together. |
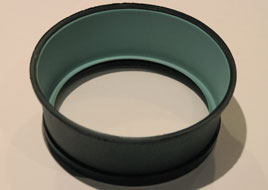
Remove the inner sleeve from the outer housing so it can be cleaned up to be reused. It will never be seen once the gauges are reassembled so there is no need to repaint it. |
 |
 |
|
|
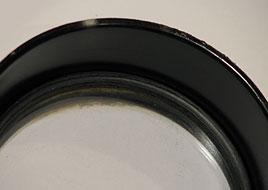
Now the clear lens is ready to be removed. The inner sleeve presses the seal around the lens tight to the housing. Clean the lens before removal to avoid scratches. |
Pressing lightly around the edge of the lens will separate the seal from the outer housing. Don't use anything to pry it out. It is not necessary and the lens could be accidentally scratched or broken. |
 |
 |
|
|
There is no need to remove the rubber seal. Both can be cleaned without separating them. Keep in mind the old rubber may be fragile and it is wise not to disturb it unless you have no choice. |
With everything apart, we can prep and paint the outer housing. The other parts will be cleaned and polished.When this is done, the gauges can be reassembled. More info come as we make more progress. |
|
|
|
|
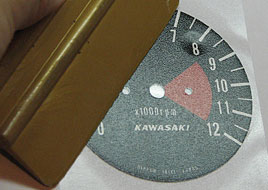
After repainting the gauge housings in the correct black, the trim ring was fitted. Make sure the glass and face are clean before pressing the ring on permanently. |
The completed set of instruments are like new. Only the gauges themselves were reused. All other pieces are excellent reproductions from our stock that we can also supply to you. |
|
Here
at Reproduction Decals we are committed to the preservation of motorcycling
history.
We don't just sell parts and graphics. We restore and ride vintage bikes. |
|
PARTS
SOURCES
|
|
Reproduction
Decals
London, Ontario Canada Reproduction Decals & NOS and reproduction parts e-mail: stickers@reproductiondecals.com telephone: 519 668-7152 |
| Wheel Building Service | ||
| Decal Application Instructions | ||
| Applying Decals on Plastic Parts | ||
| Seat Stencil Application Instructions | ||
| What if we don't have the decals for your motorcycle? | ||
| Frequently Asked Questions and Policies | ||
| BK Custom Coatings - Our Recommended Painter | ||
| Contact Us | ||
| Customer's Comments | ||
| Customer's Bikes - See our decals in use | ||
| Restoring Seat Trim | ||
| Restoring Gauge Faces - Back Lit Meters | ||
| Restoring Gauge Faces - Side Illuminated Meters | ||
| Restoring our 1970 Kawasaki H1 - In progress | ||
| Restoring our 1968 Suzuki TC250 Scrambler | ||
| Restoring our 1970 Suzuki T125 Stinger II | ||
| NOS Honda Keys. We have thousands! | ||
| Restoring an SL70 - Randy Marble shows us how | ||